
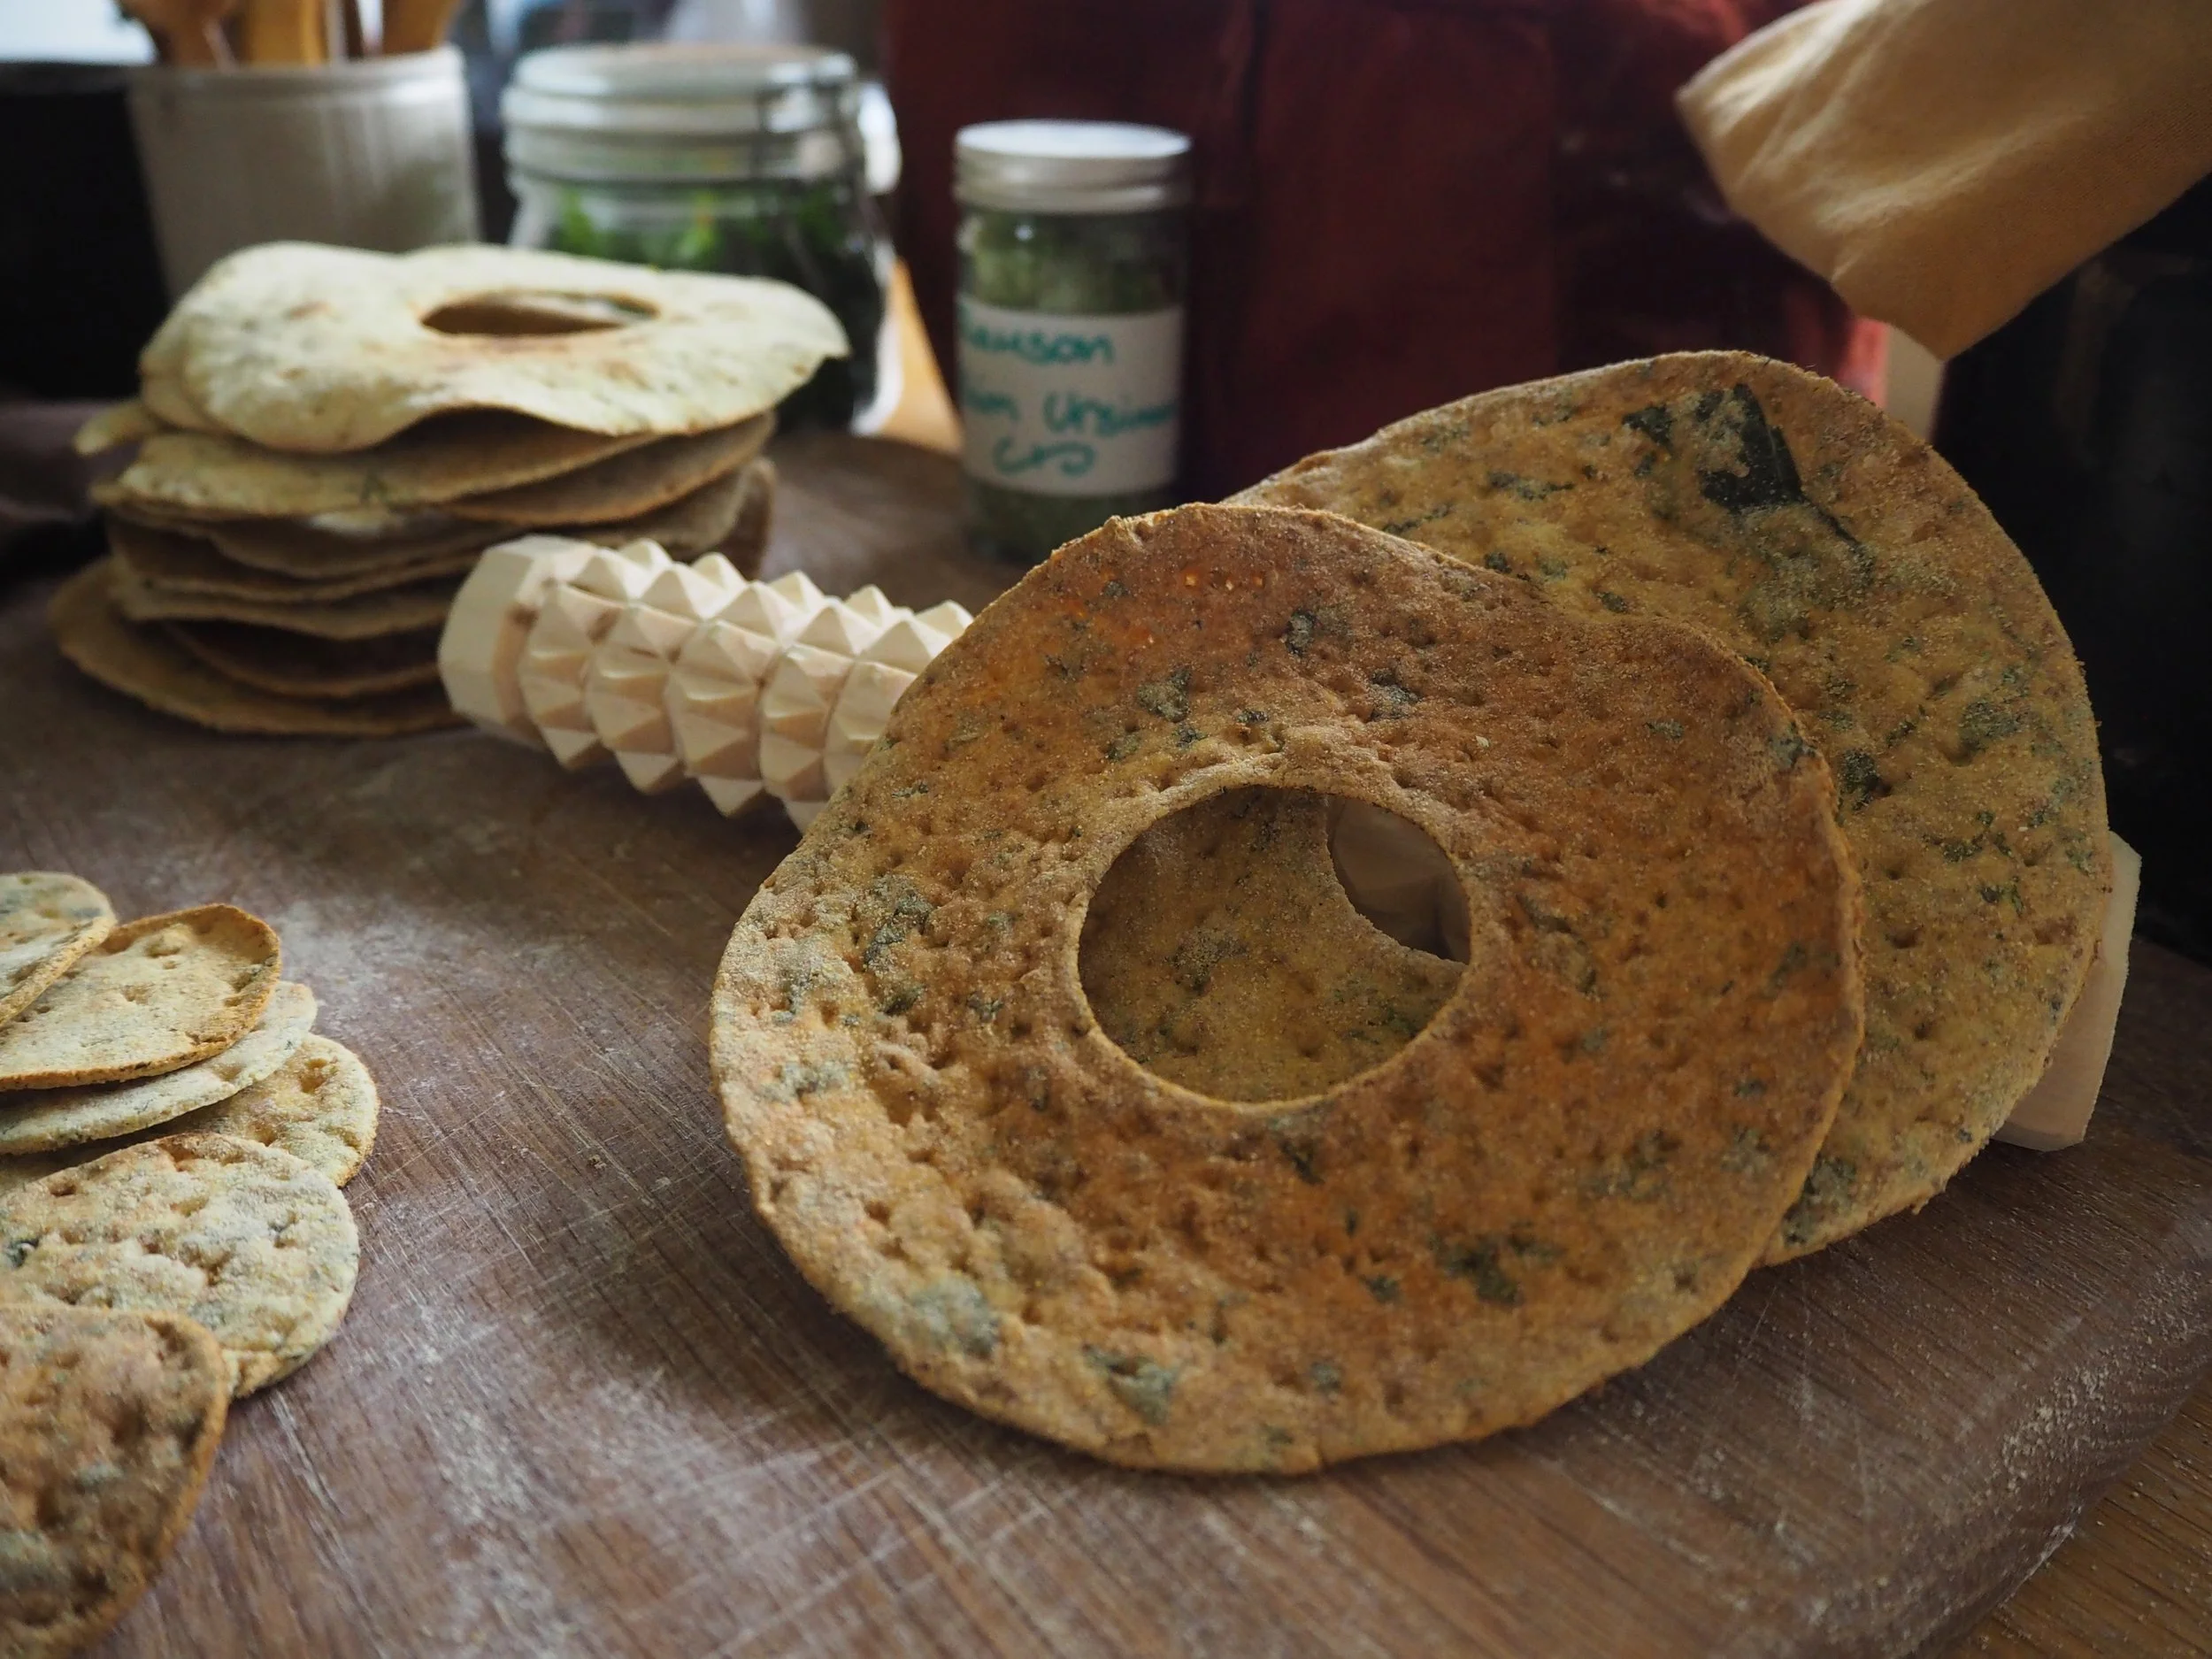
Crispbread and a Knurled rolling pin.

Making bread is one of those homely tasks that offers a warm sense of satisfaction, especially when you’re adding some foraged ingredients to the mix. I try as often as I can to bring wild ingredients into my home life, in this way I feel a connection with nature in all aspects of my life. I don’t leave all my ‘friluftsliv’ in the wild, but hope to merge my modern lifestyle with that love of nature.
I get a great amount of gratification in making trail food at home too, avoiding the expensive and often bland dehydrated commercial packs as much as possible. One simple way I do this is to make flat-breads of many different kinds, to pack into a billy-can and take out for a trail side lunch. In this guide I’ll show you how to make a Crispbread similar to the Swedish knäckebröd, but with a blend of flours and some of the wild-food woven in too.
First though, to make this crispbread I want to use a traditional tool for texturing the bread and punching the air-bubbles from the dough. And that seemed like a good excuse to make a Knurled Rolling pin, so let’s make a start.
Although the etymology of the word is derived from the old english knaur, meaning a knot in wood, what we need is a good straight piece of seasoned wood...ideally knot free.
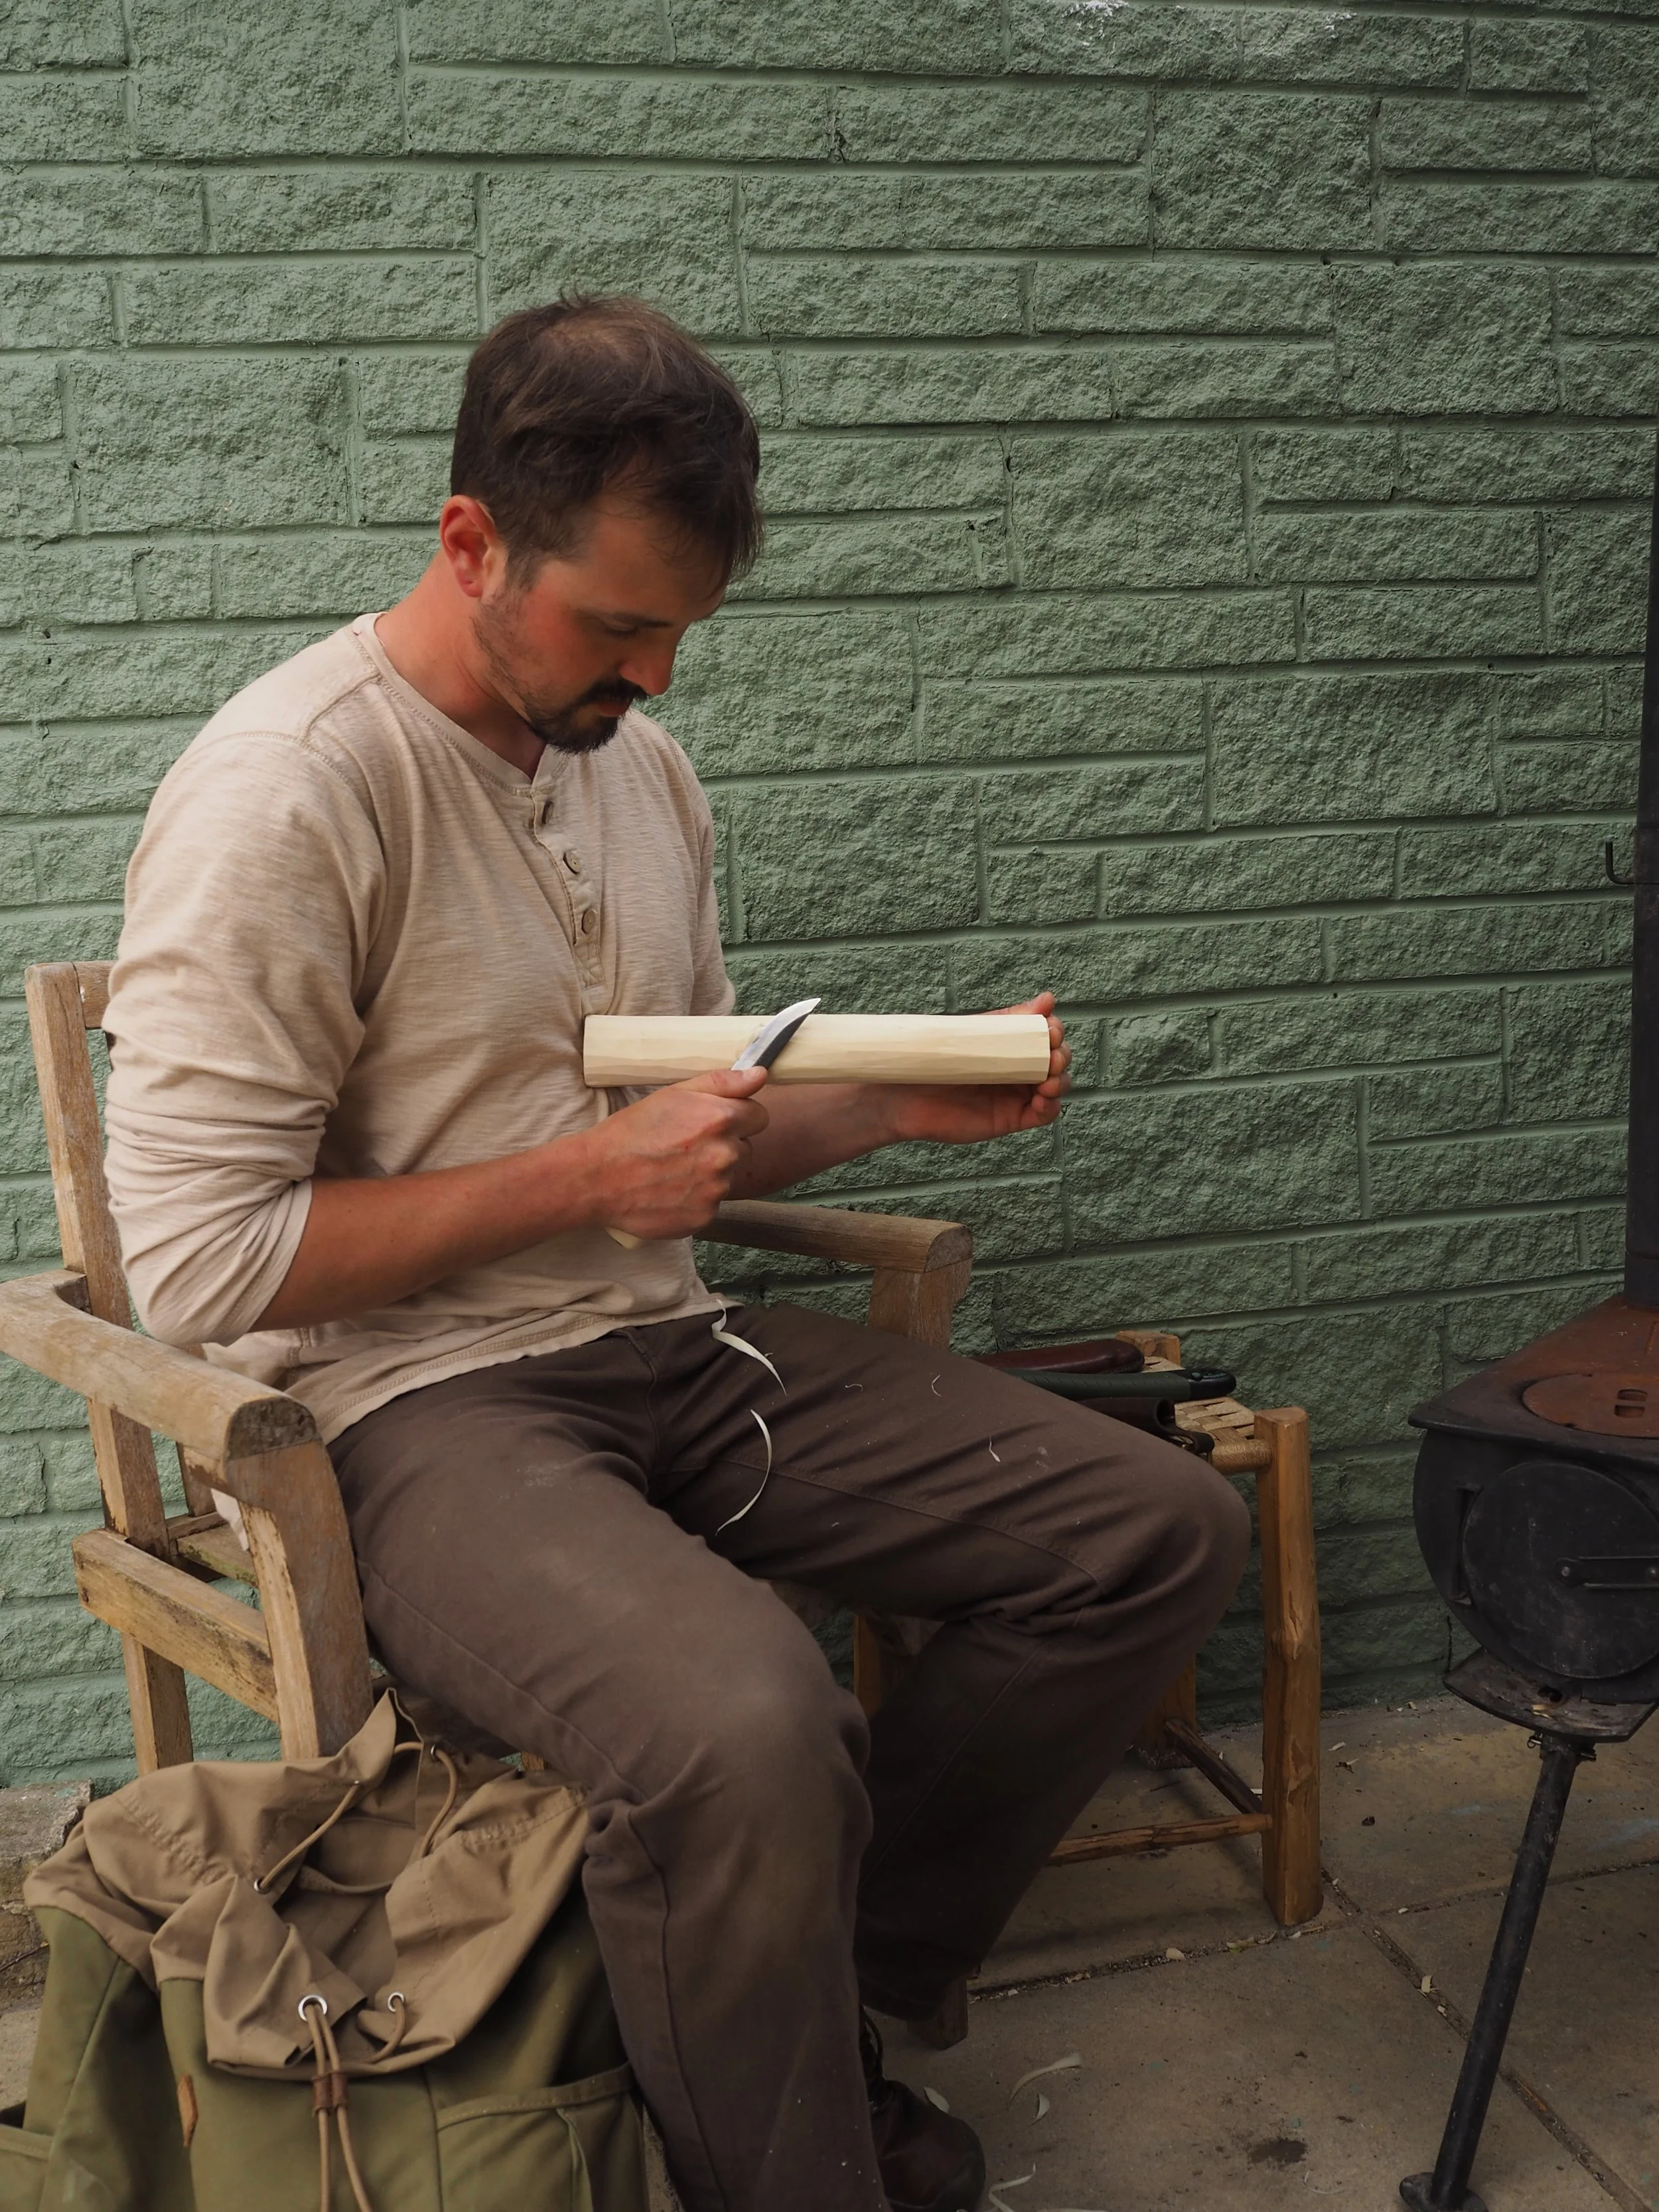
I need to make the wood as straight and consistent as possible, I mostly use the forehand and pull stroke cuts to do this, working towards a cylinder around 25cm long and 5cm in diameter. I then mark off a series of rings spaced 1cm apart down the entire piece. These lines, which I’ve done in black so you can see, need to be neat as they’ll form the peaks of our textured rolling pin; the neater these lines and the closer to stick to them the better your finished work will be.
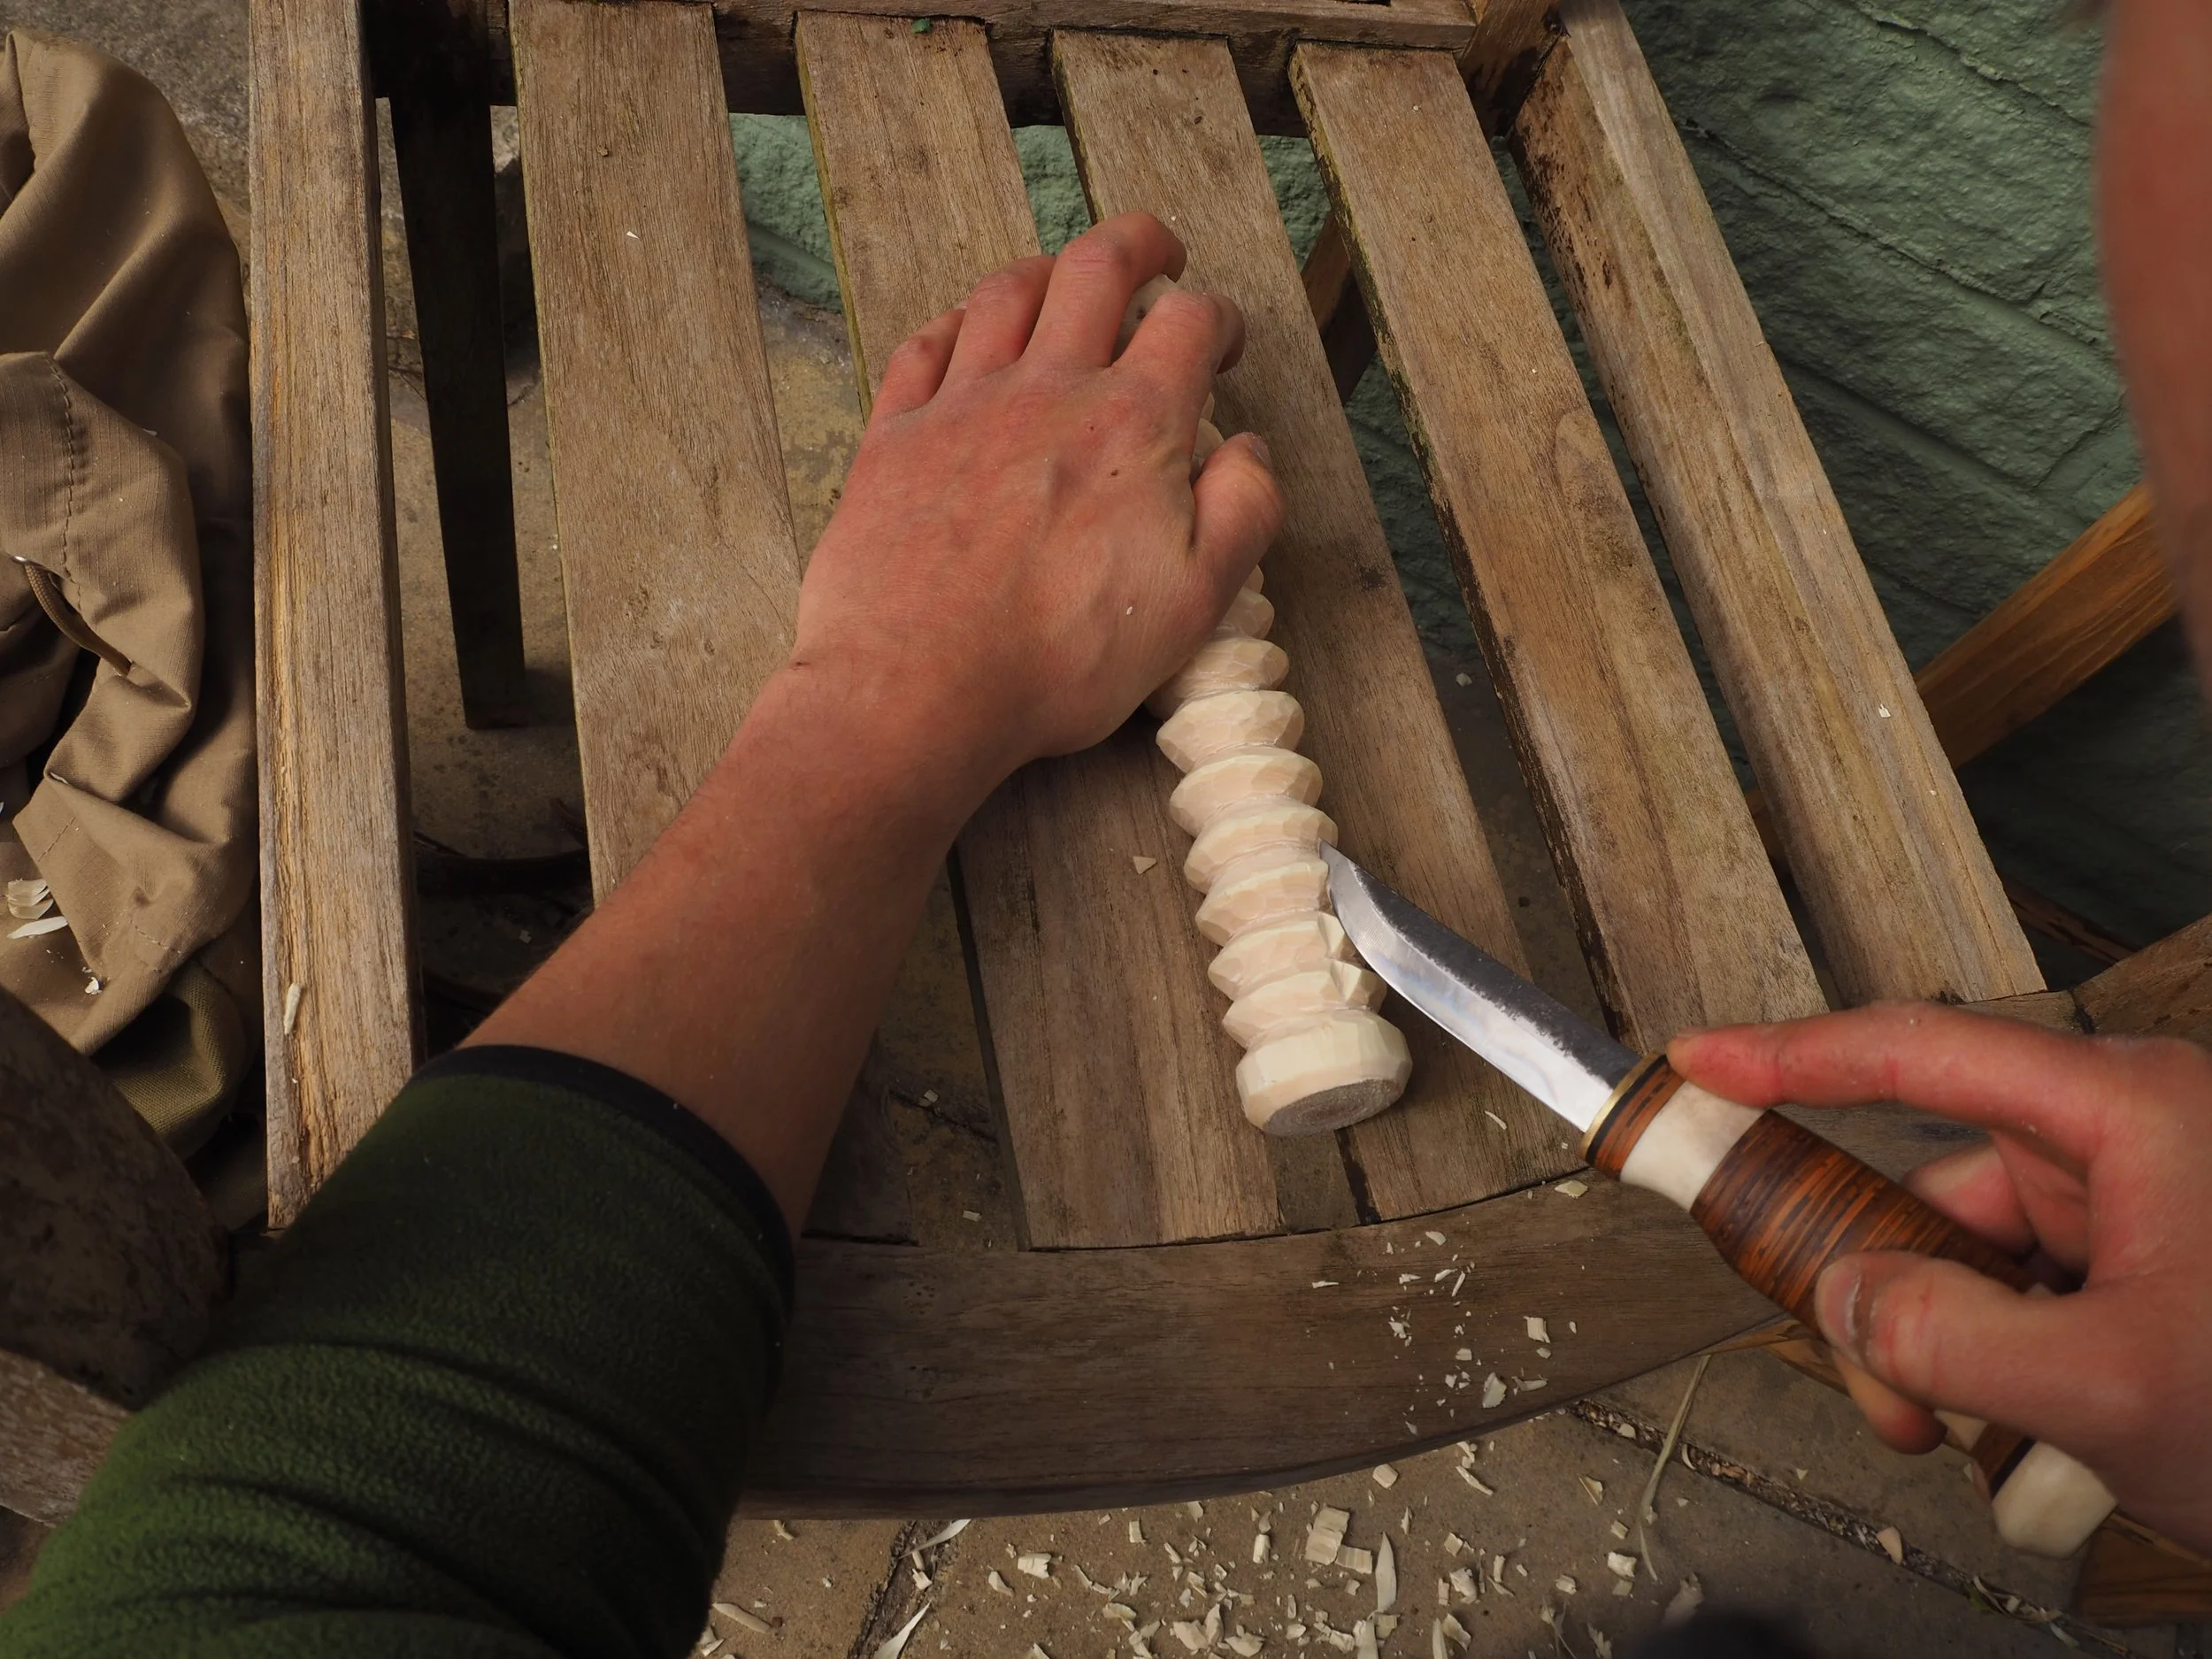
Next, I cut a valley between each of the lines. To do this I start with the edge of my knife on the line and thumb-push into the middle, going right around the stick in this way. Then flip the stick 180 degrees and cut in from the next line back towards the middle. I continue this back and forth until the valley has a clean, defined V cut into the stick around 8mm deep. I then move onto the next valley, essentially aiming to make a ribbed stick.
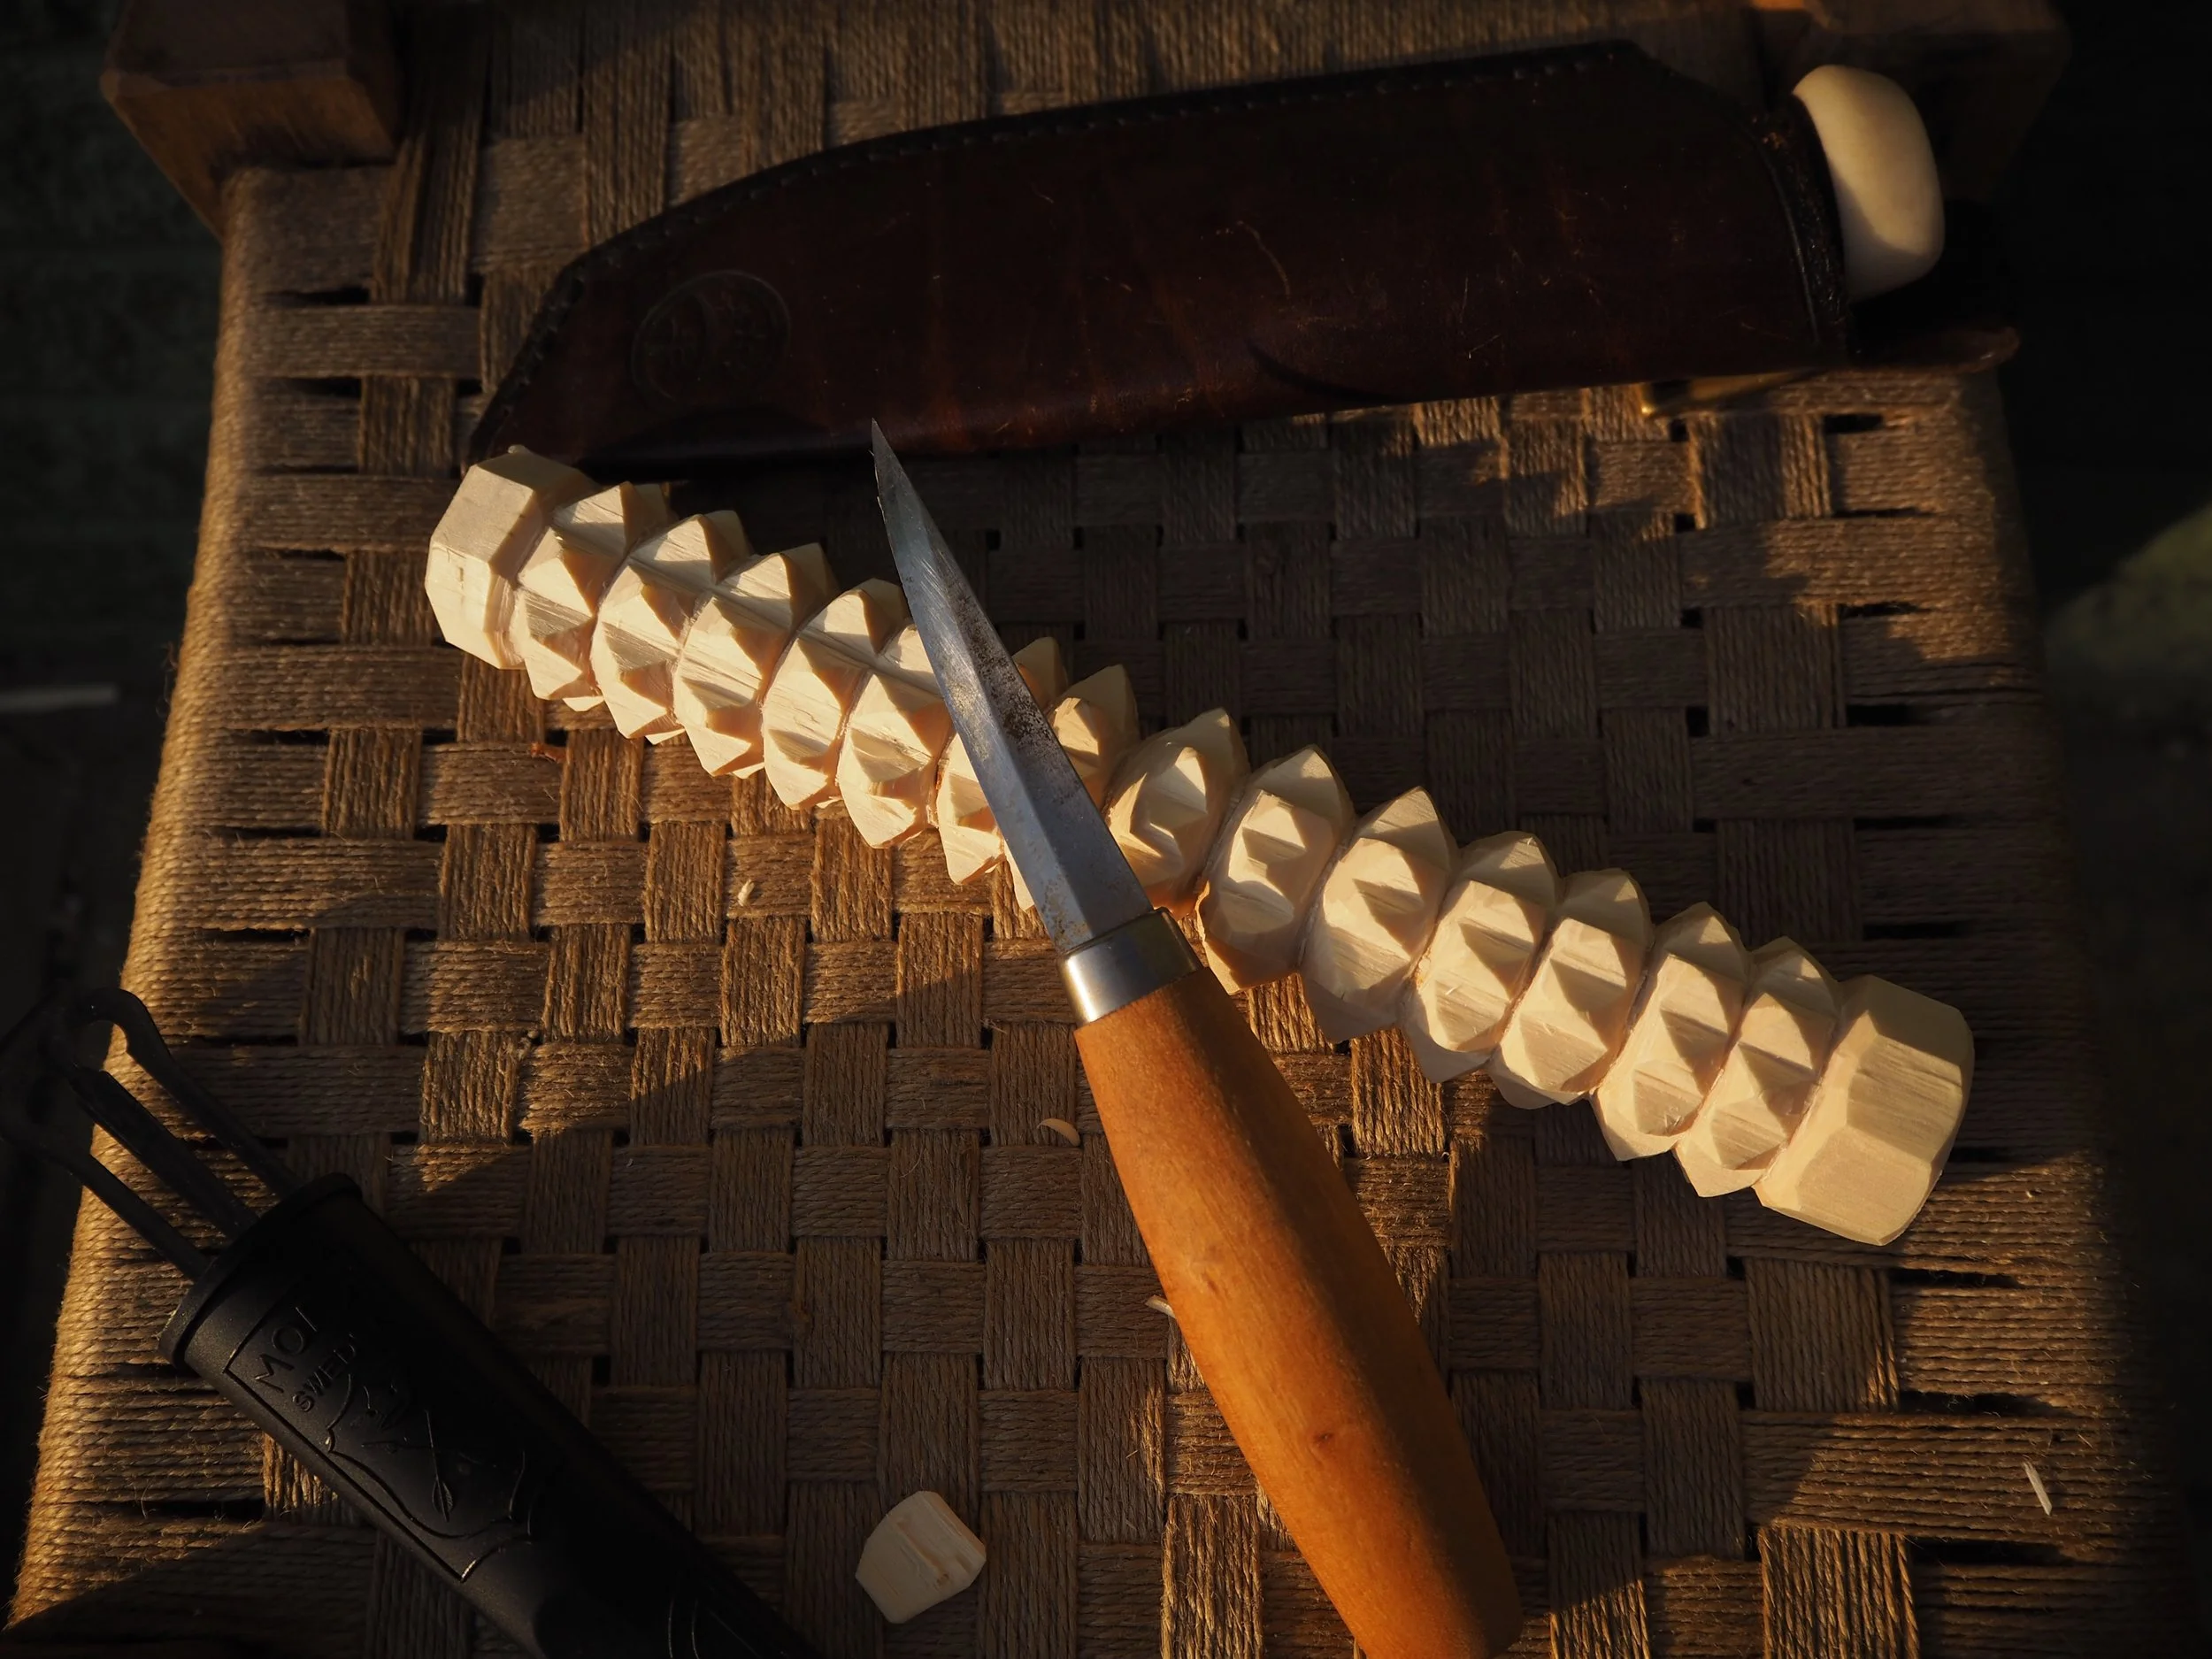
Once these are all cut, I then need to create V notches up and down the stick turning those concentric rings into spikes.
To do this I use the very tip of the knife, a Mora 106 worked better for this as it has a narrower width. I found the simplest way to create a neat line was to run from one end of the stick to the other making V cuts, rather than going around the stick one ring at a time. You do need to be gentle here as you can quite easily break the tips off as you cut in, usually the thickness of the blade is to blame here by ‘pushing’ the tips to break as the width of the blade is pressed into the wood. So go slow, be methodical, and enjoy the repetition.
You can help preserve the wood once you’ve finished by oiling it, my preference is walnut oil but as long as you use a polymerising oil you’ll not go far wrong. Avoid anything sold as a wood treatment in the hardware store, as they tend to contain chemicals you don’t want mixing with your food.
With the knurled-pin made, let’s get stuck into the bread making.
This recipe is a very basic one, using ingredients I often carry on canoe trips and sometimes when camping for a few nights. You can of course experiment with many other types of flour and extra ingredients, but this is a baseline which I find produces a reliably flat and crispy bread that last for many weeks stored in an airtight container.
I’m making the bread here at home, ahead of some hiking days during the Lockdown of 2020, but the bread can be made outdoors during trips without much difference; you may opt to use a sharp stick to prick the dough rather than carry or make a pin as above, and you can make the dough flat between your fingers rather than rolling. However, as I’m accustomed to making this kind of bread on the trail I don’t have specific weights as I’m not carrying a weighing scale around in the haversack; so I use my camp mug as the measure, opting to read the ‘ml’ marks for consistency.
Ingredients:
300ml Wholemeal Spelt Flour
150ml Maize/ Cornmeal
A handful of dried herbs
1 ½ teaspoons salt
Just enough water to make a tight dough (approx. 120ml)
Method:
Using a camping mug, measure your flours and pour into a billy can.
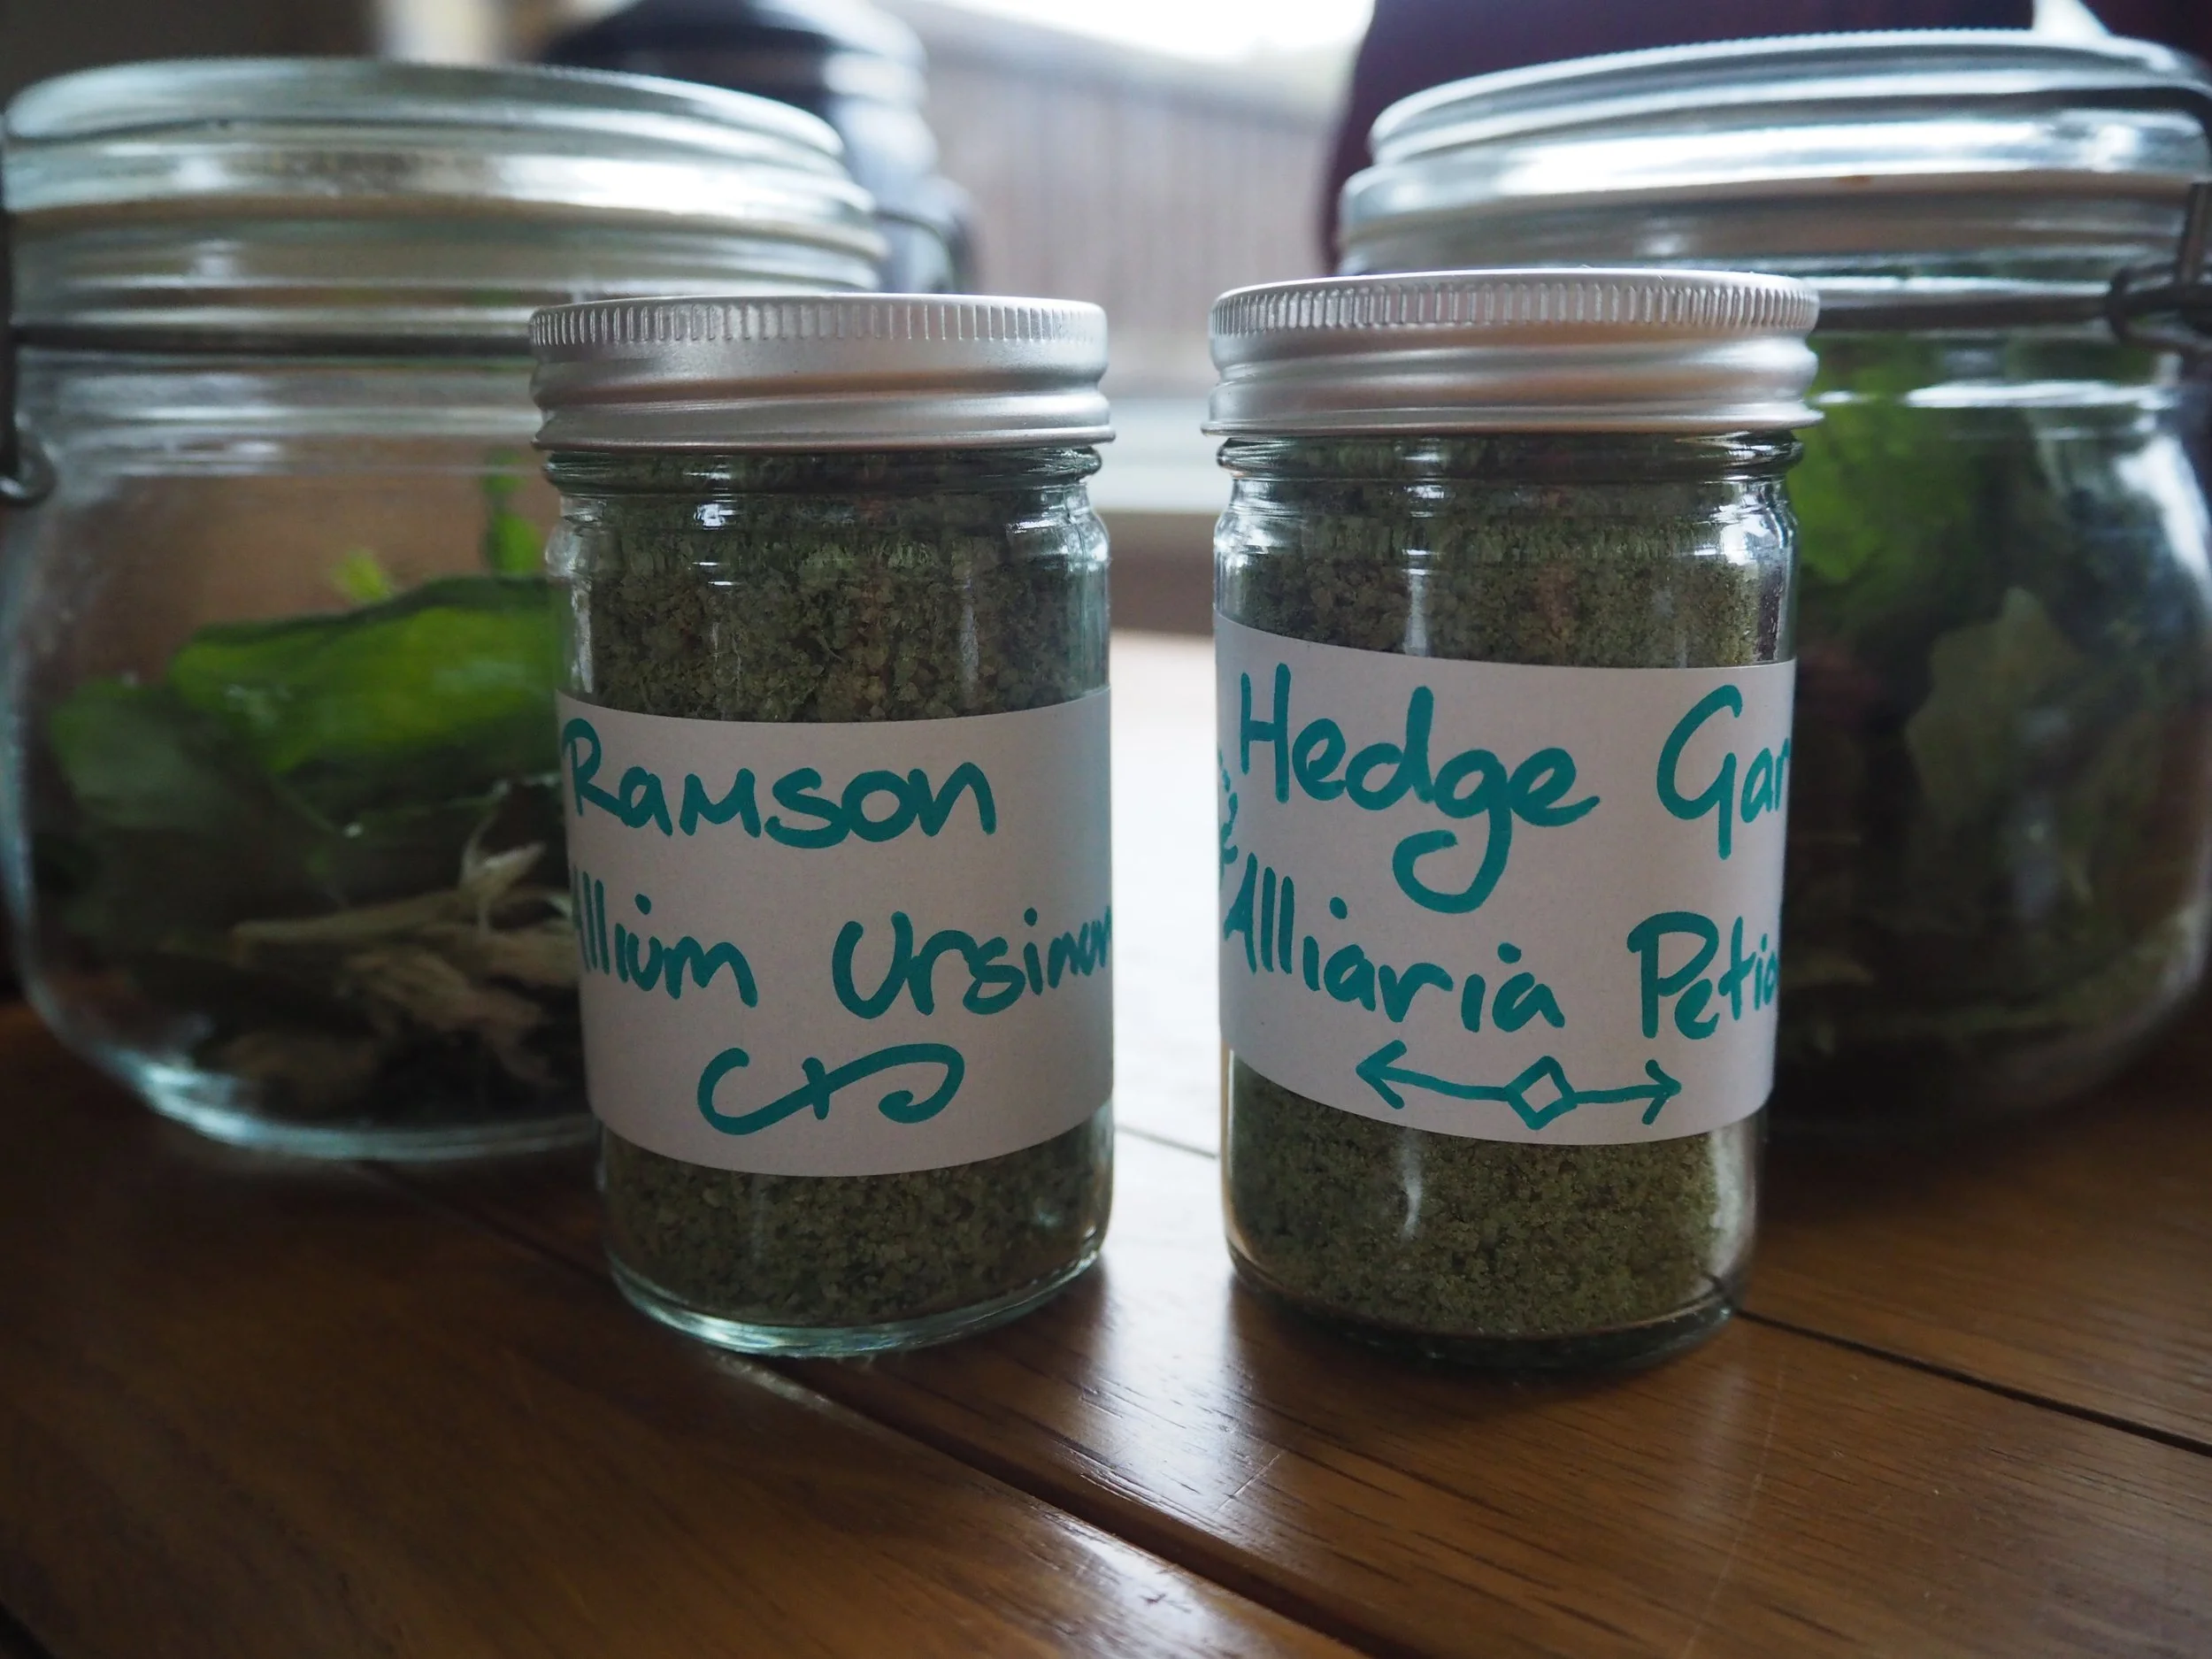
Add the salt, here I’m using some Ramson Salt I made in the Spring. You can see how on the blog…
And add the dried herbs, I’m using some shredded Hedge-garlic (Alliaria Petiolata) which I collected and dried myself. You could use any dried seasoning though, I avoid fresh in this instance purely as I want to dry-cook the bread to store it long term and any moisture from the ingredients will interfere with this.
With all the ingredients in the billy can, I slowly mix in the water and stir with a wooden spoon until the rough dough is incorporated.
Here is where making the bread at home differs a little from in the woods: In the woods I’d keep the dough in the billy and knead it until smooth with my fists. I’d then typically use my fingers and the flat underside of my billy-can’s insert dish to make the dough flat, cooking them either directly in the embers or by laying my billy on it’s side in the embers and cooking the breads one by one inside.
As I’m at home though we can use the table to knead the dough and roll it out flat with a smooth round stick (or a rolling pin I suppose).
To make the crispbreads pull off a golf ball size piece of dough and roll flat, making it as thin as possible.
Then crack out that knurled rolling pin and give it a couple of passes over the dough, flip the dough over and another couple of passes on the other side. If you don’t have a knurled pin you can use a fork or the tip of a knife, this step is important to puncture any air pockets and helps keep the bread thin and flat when cooked.
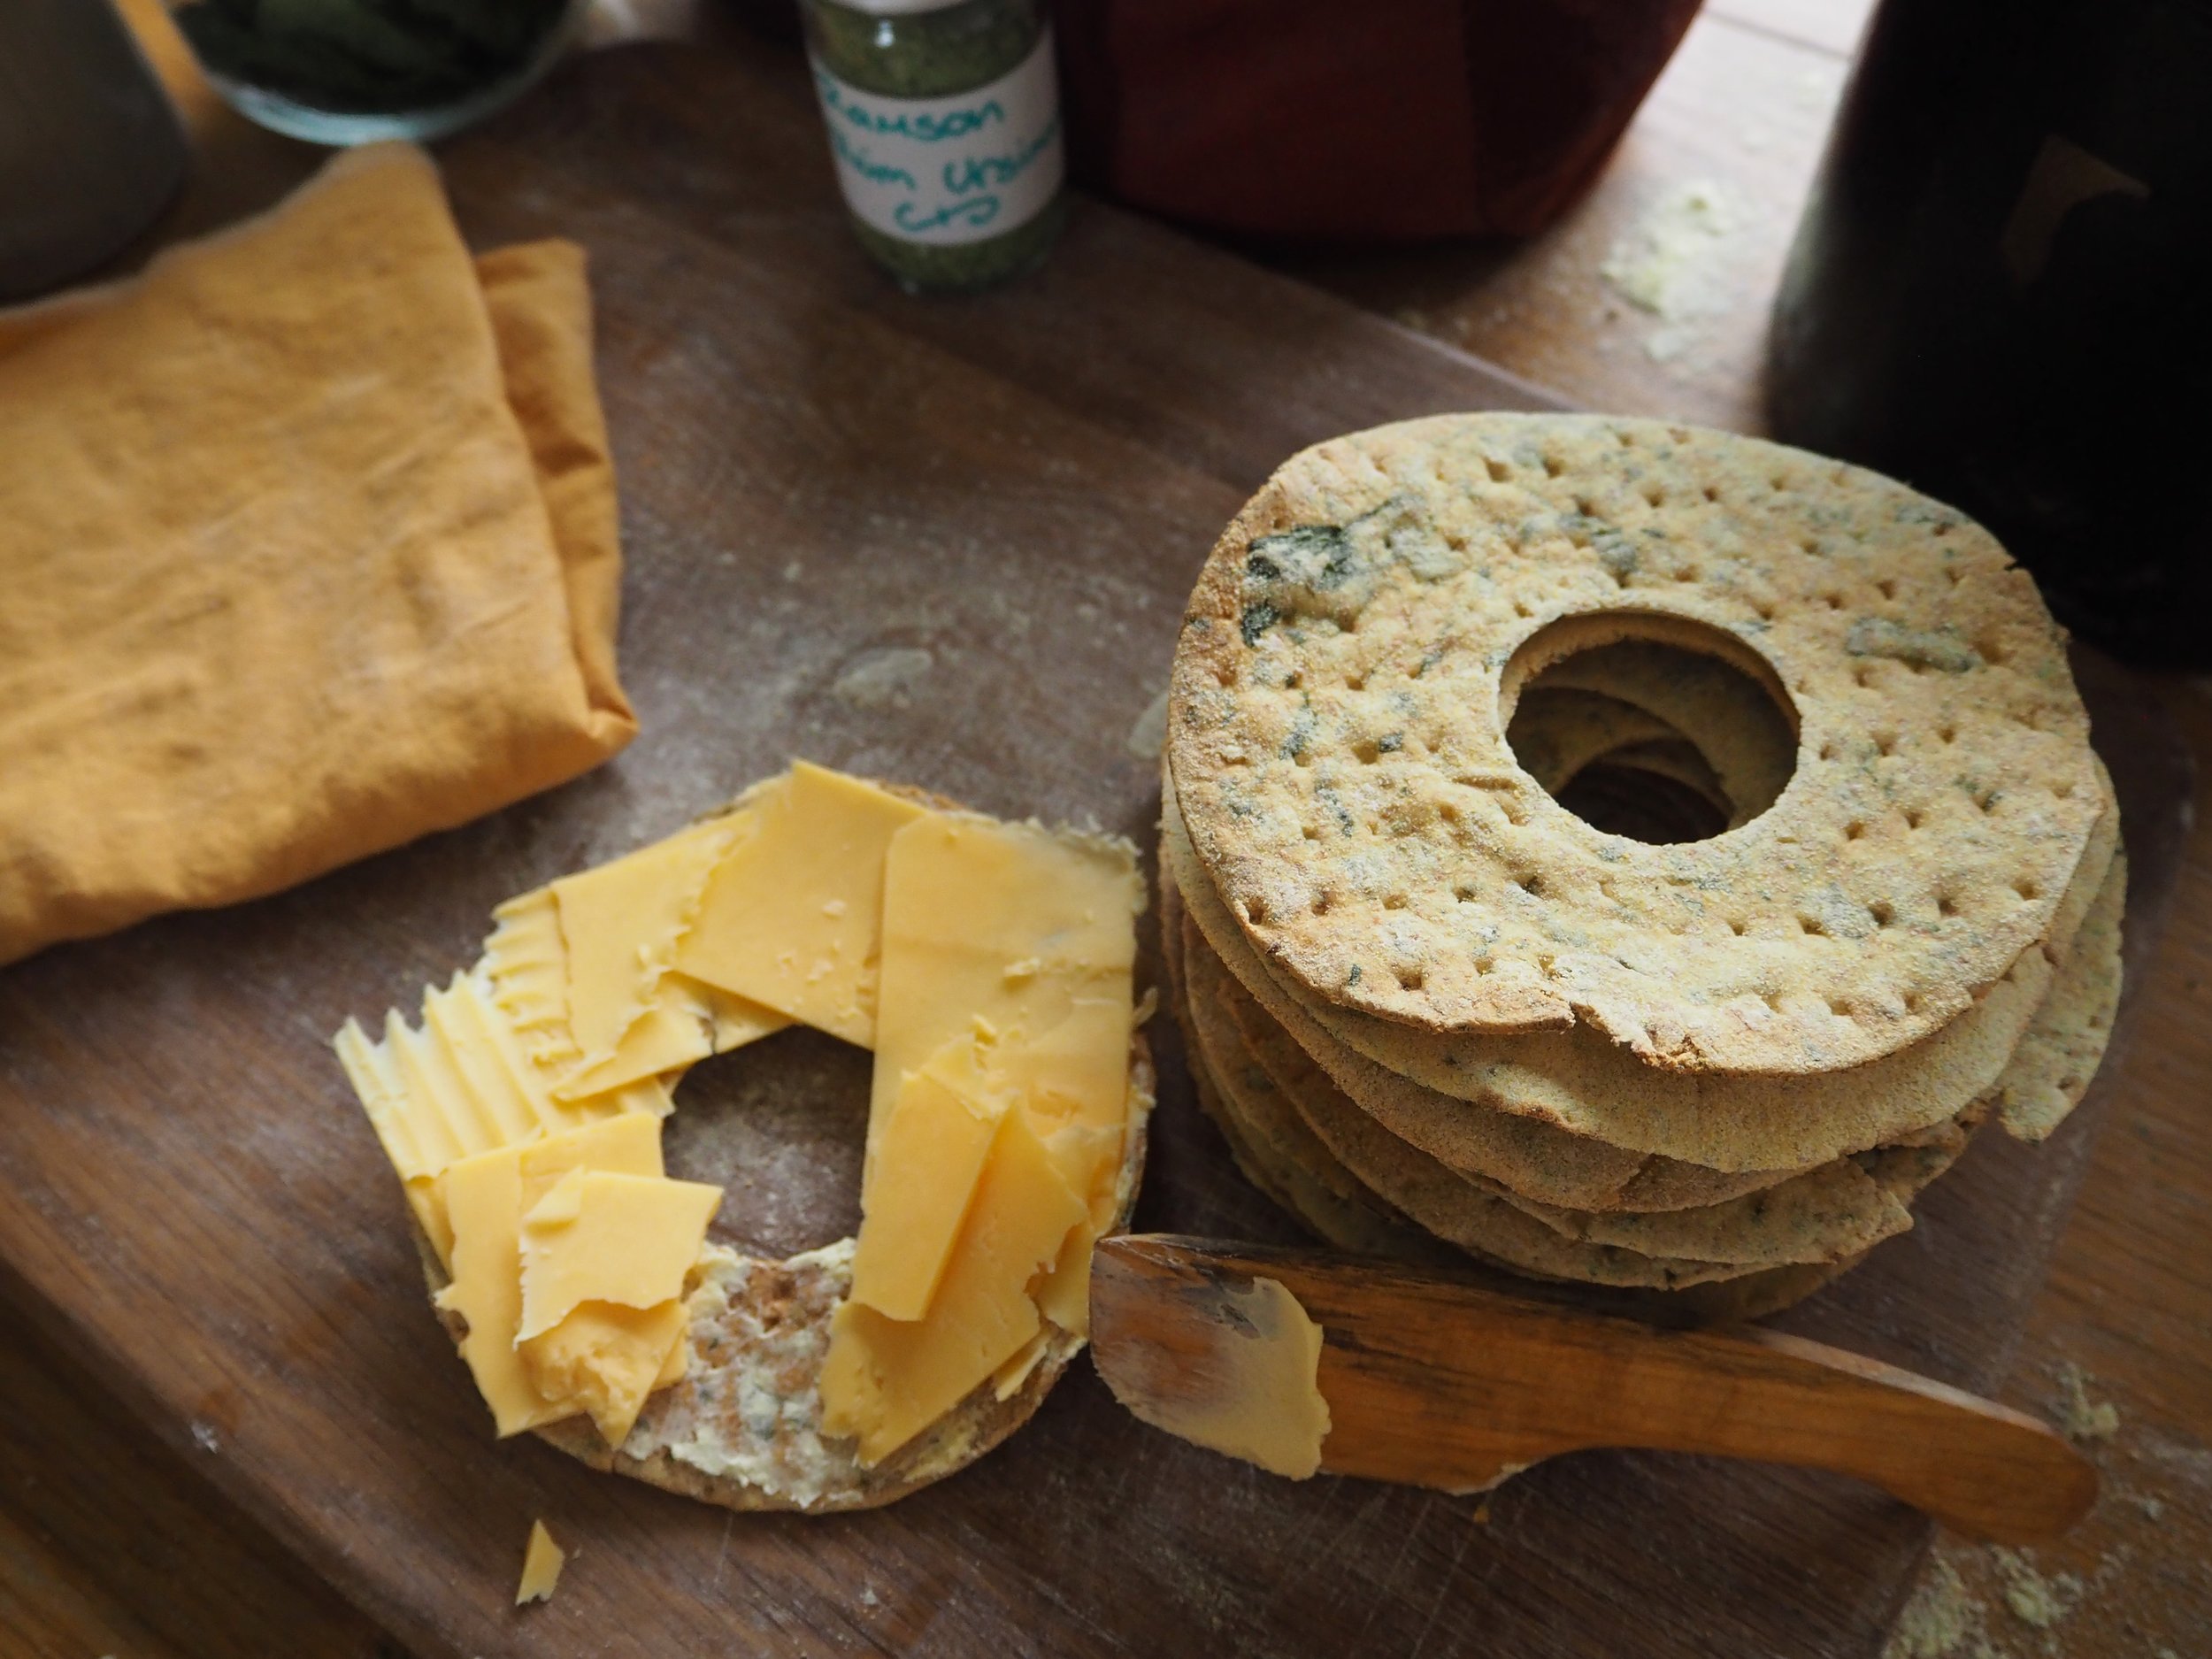
To cut the breads I like to use the lid of my 14cm billy can, as it’s a good size in general for the crispbreads and also it means the cooked breads fit neatly inside my billy can for transport during hikes etc. In this way I can carry a few breads, some spread of butter or potted meat, maybe some cheese, all in one billy can without the risk of breaking the breads while traveling. I also like to cut the traditional hole in the middle to allow the breads to be hung for drying. To store these long term the idea is to make them as dry as possible, as mold and bacteria need moisture to grow well. The cut out centres I just eat immediately after cooking...can’t help myself.
To cook the flatbreads you can use your oven at home, about 180C for 10 minutes on a baking tray will do it, although I prefer to use a heavy skillet with no oil to cook mine on a medium heat on the stove. I cook them to a golden finish and you’ll notice as they cook they slowly go from flexible to very stiff, this hardness tells you they’re ready.
The breads once cooked can be strung up to cool and further dry ready for storage, of course if you’re making these during a trip you may just pop them straight into your pack once cool.
Perhaps more akin to a cracker than a bread, this simple trail food keeps me going in the hills and forests. I hope you find your own unique spin on the recipe, do feel free to get in touch and let me know how you get on with yours.
All the best
JD Howl Bushcraft